


PHOTO WALL STANDARD CREATION INSTRUCTIONS
THE TINYME 3 STEP GUIDE TO CREATING YOUR PHOTO WALL STANDARD MASTERPIECE
BEFORE YOU START: Tinyme photo stickers will stick to most clean flat surfaces & even to some textured surfaces. For freshly painted walls allow a 3 week drying period.
Before applying you should make sure the surface is clean and dust free.
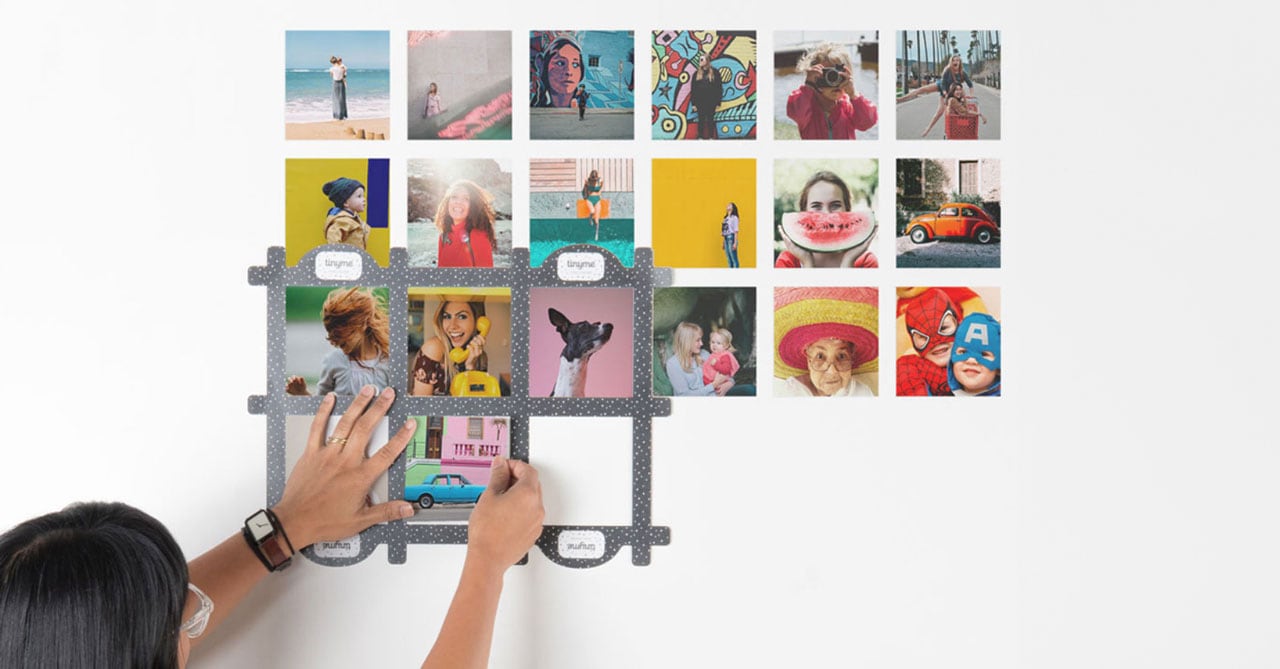
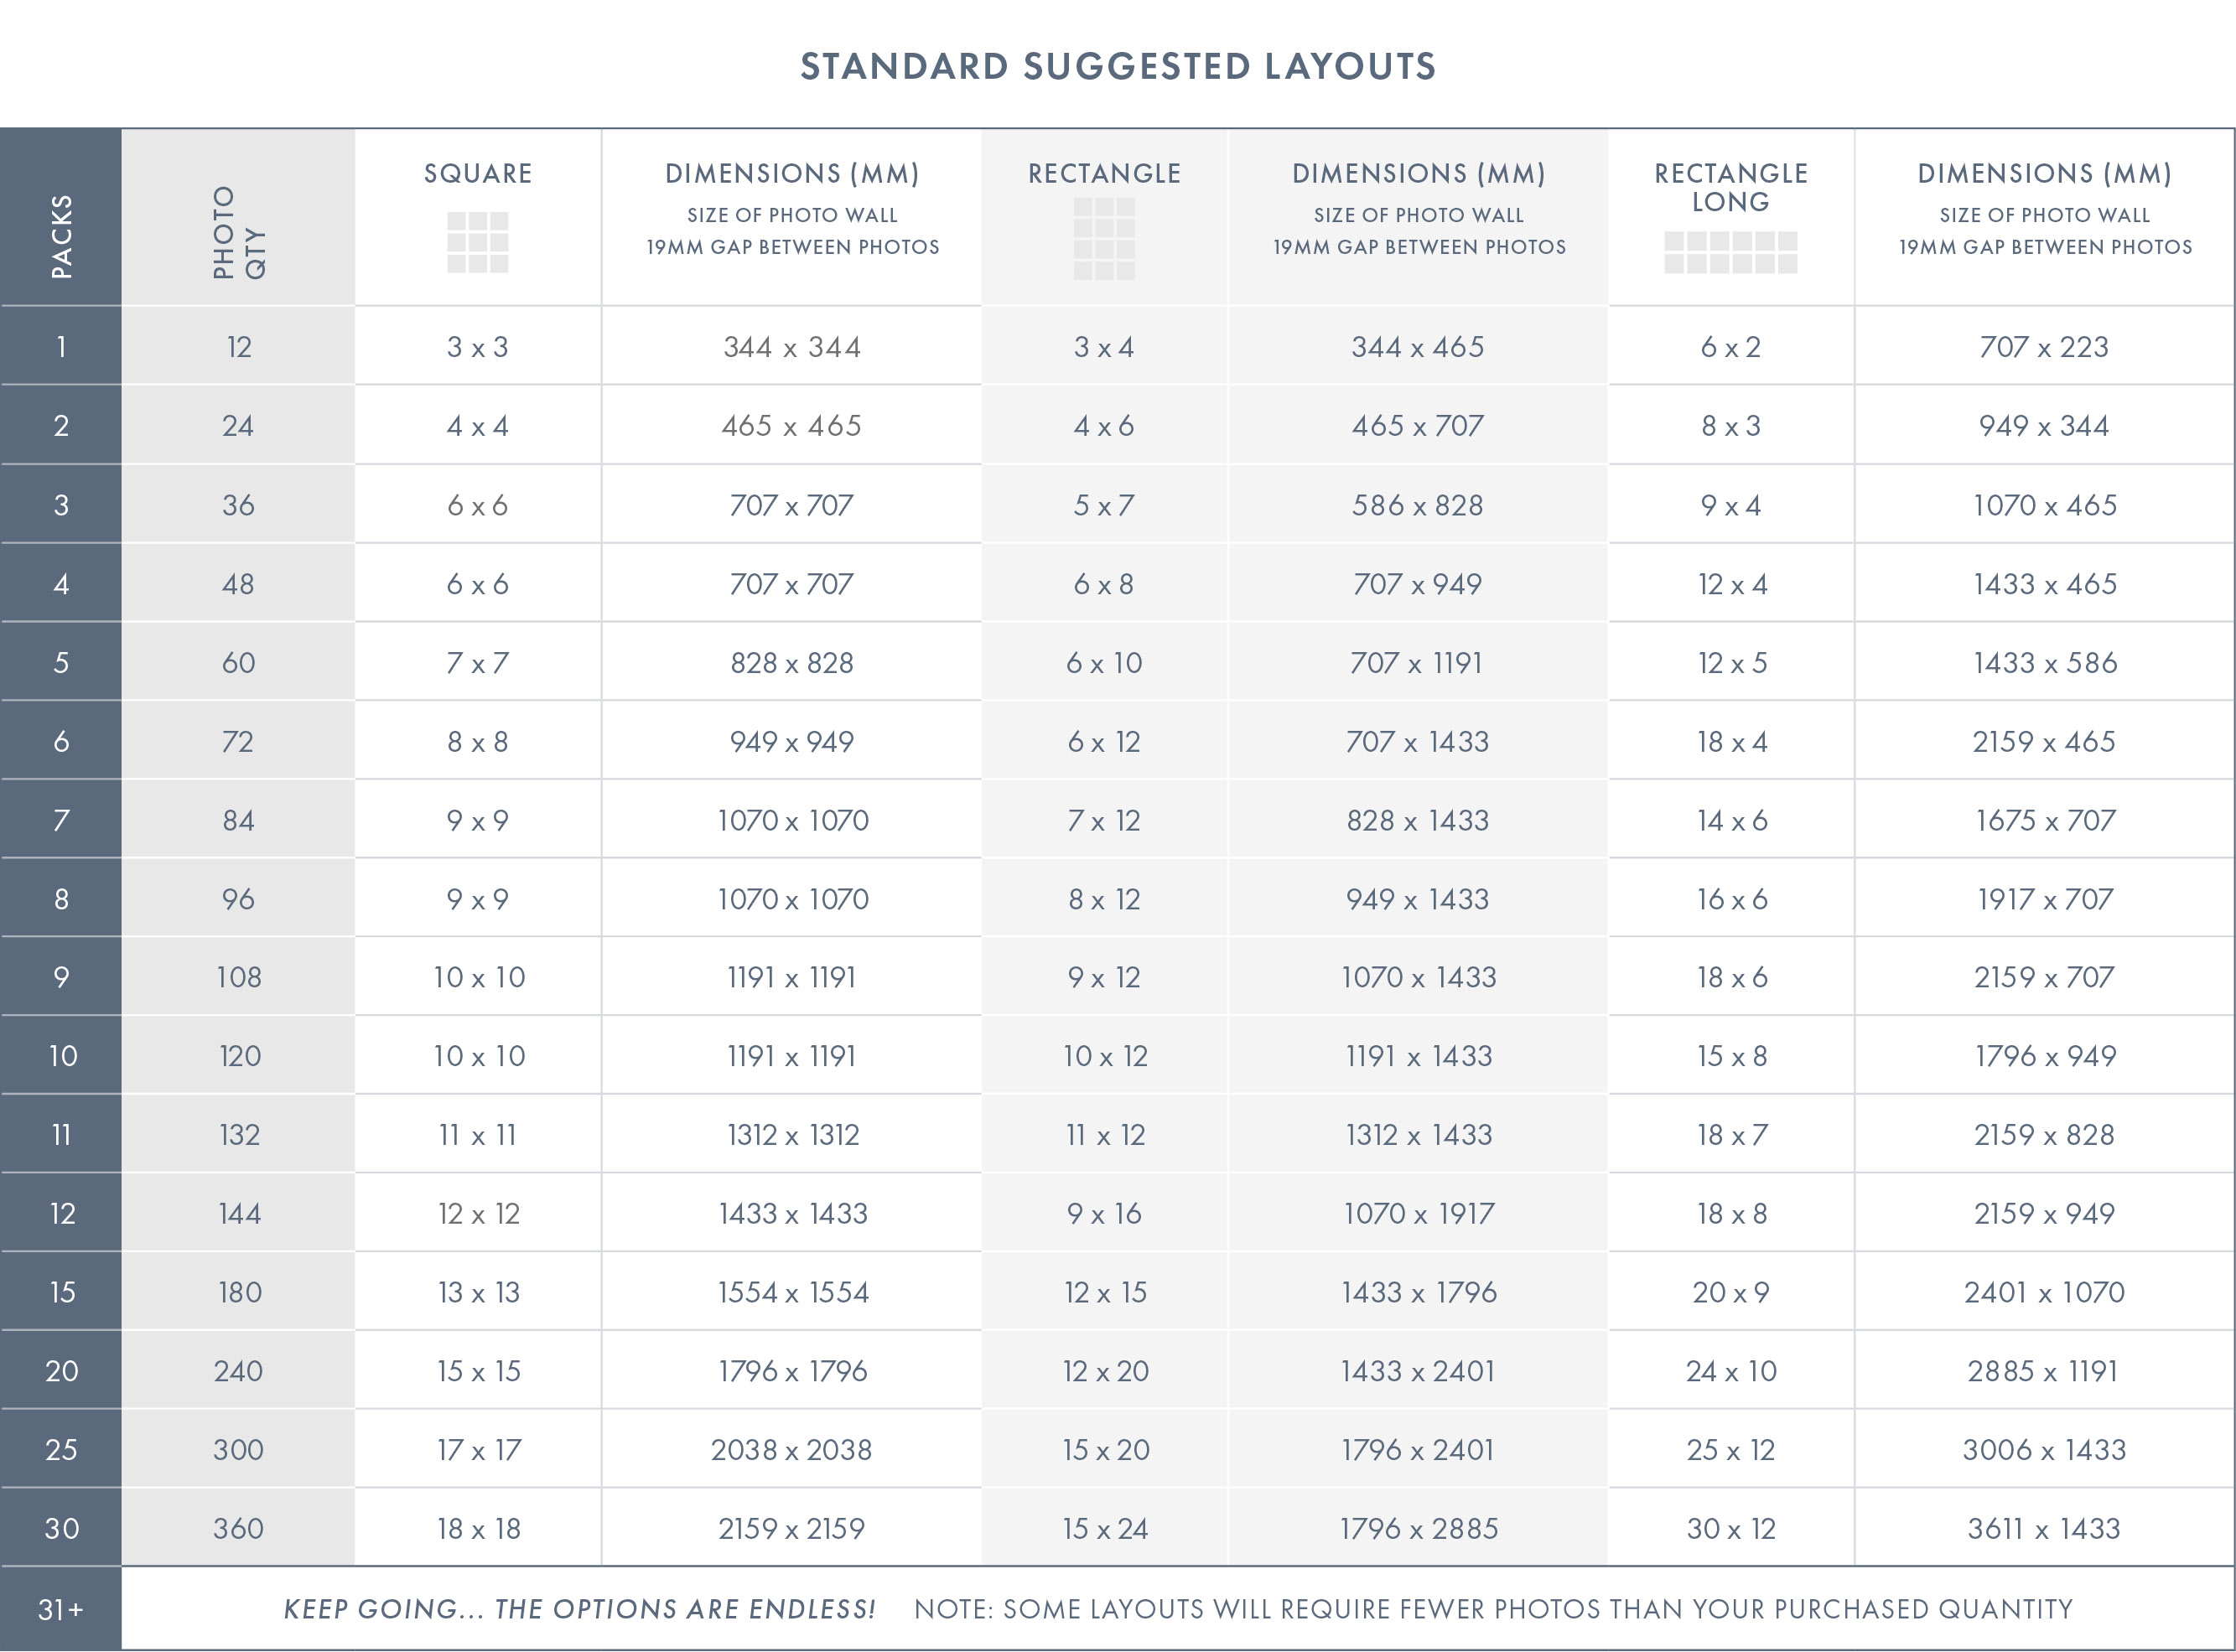
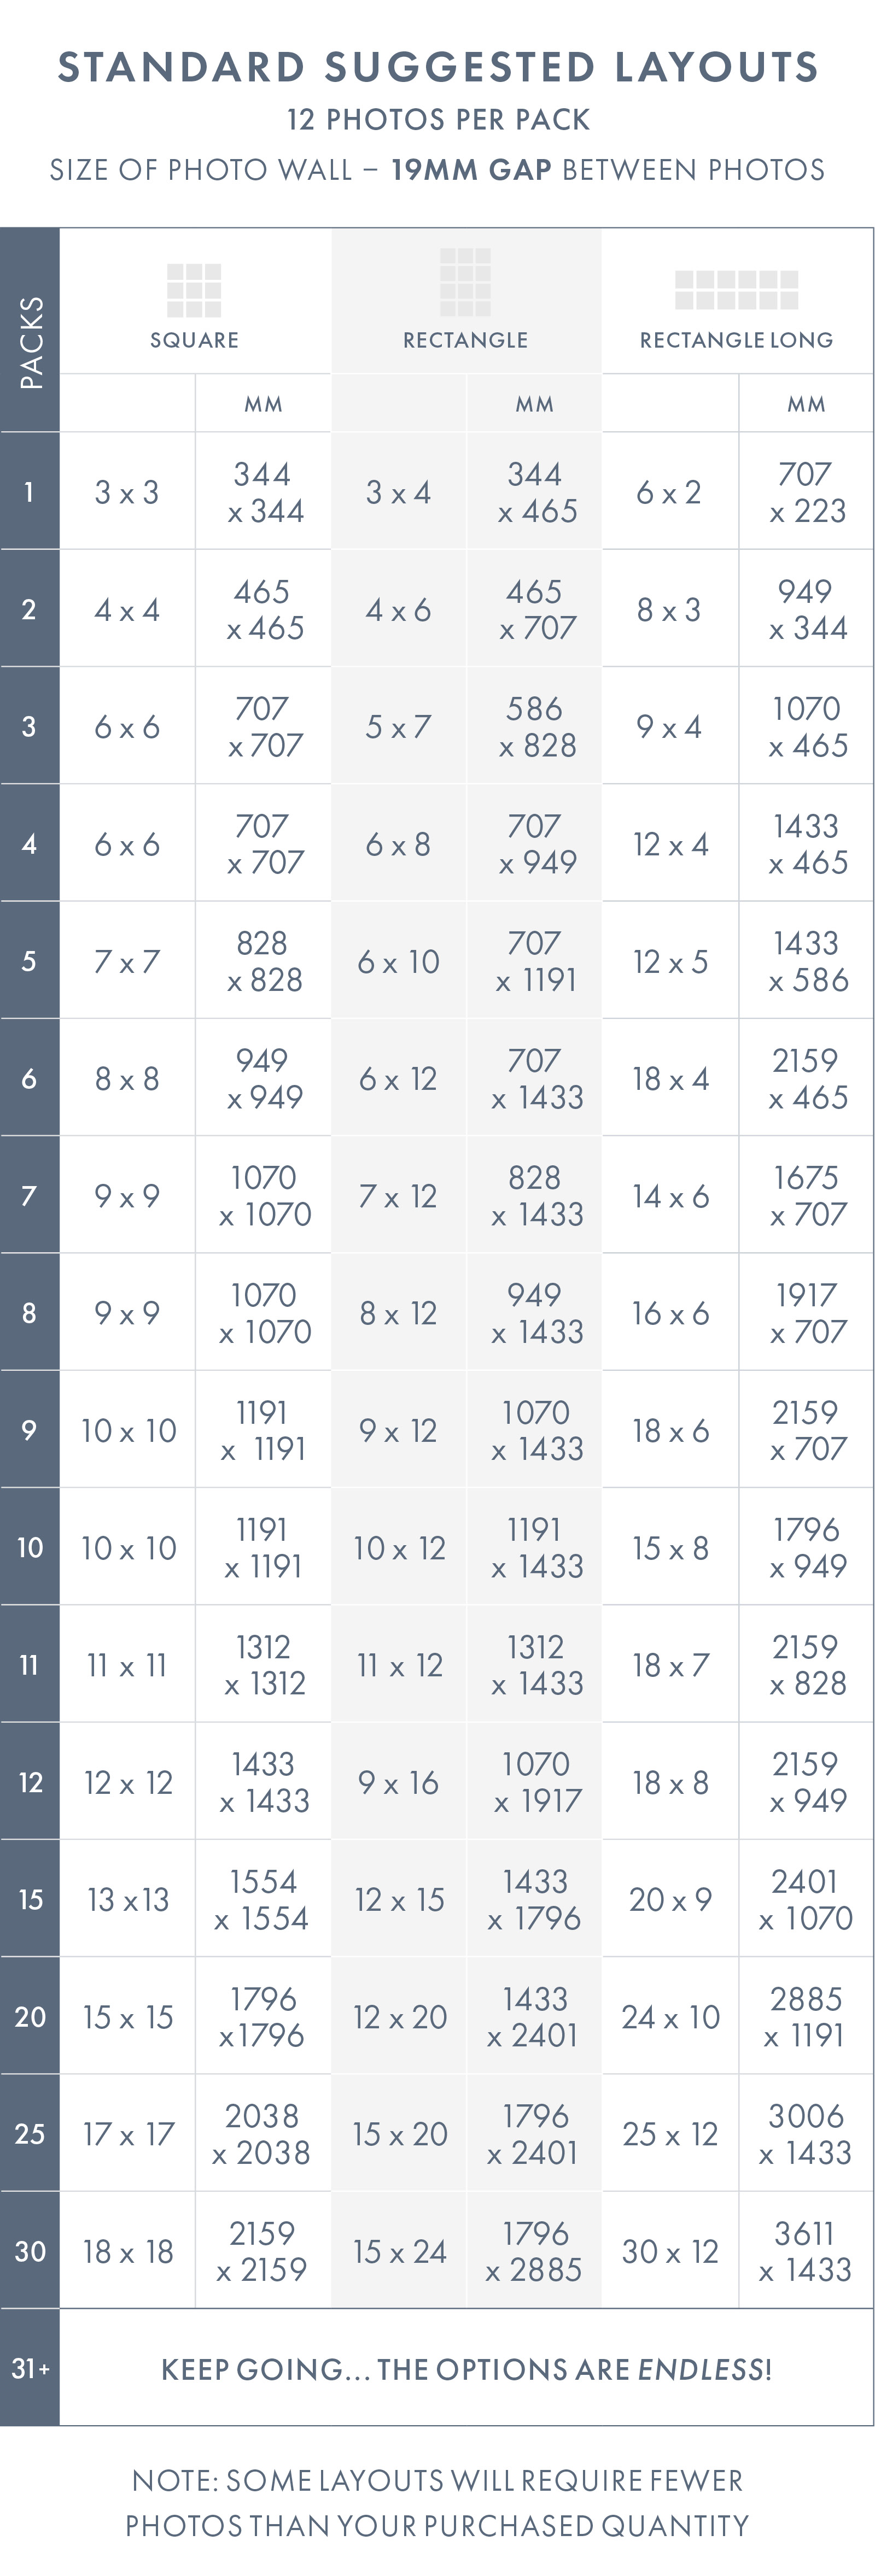
STEP 1. Choose a layout of rows & columns and the corresponding dimensions using the Photo Wall Standard Size Guide (shown below).
STEP 2. Determine where on the wall you would like the first photo and stick Terry Template to the wall. Measure off the ceiling or floor, or use a spirit level to help get Terry Template straight
STEP 3. Insert your photos into the Terry Template squares. Move Terry Template across and insert more photos until the row is done. Move Terry Template down to repeat and finish your masterpiece
TAKING THE STICKERS DOWN: To remove, carefully lift a corner & whilst folding the sticker back on itself, slowly peel off. Our photo stickers shouldn't damage your wall, but it is important to be careful when removing in case the wall has been poorly prepared before painting. If you are concerned, or if the wall offers resistance, heat with a hairdryer while removing. The backing paper is a good place to store your stickers.

THE TINYME 5 STEP GUIDE TO PERFECTLY LABELLED CLOTHES
1. Preheat DRY iron to medium heat.
2. Peel off the label & place onto fully dry garment, text side up. Please note: Labels applied to damp garments will not adhere properly.
3. Cover label with supplied parchment paper & press firmly with iron for 10-20 seconds. DO NOT move iron around.
4. If edges are not fully stuck (try peeling label off with fingernail), you may need to increase temperature, pressure or time & repeat above steps.
5. Safety Check: Before giving any name labelled item to small children, check that the name labels are fully and safely adhered.
WARNING: Labels can be a choking hazard.
Please note: If garment is not suitable for hot iron please be careful and iron at own risk. Never iron directly onto the label.
TINYME STICKY LABEL INSTRUCTIONS
TINYME STICKY LABEL INSTRUCTIONS
1. Adhere your name labels to smooth surfaces that are clean and dry. The following surfaces may not be compatible: Plastics that contain high silicone (non stick), plastics with a greasy feel and plastics with a highly textured surface.
2. The adhesive on our name labels is pressure activated and will only adhere best after sufficient pressure is applied. Once in place, rub firmly, applying pressure over the whole name label, especially the edges.
3. Please wait 2-3 days for the adhesive to ‘cure’. In dishwashers, items should be placed on the top shelf and are not suitable for “high temperature” settings such as “pots and pans”.
4. Before giving any name labelled item to small children, check that the name labels are fully and safely adhered.
Good To Know: Our paper labels including our Paper Name Labels, Address Labels, Book and Gift Labels are not waterproof and thus not suited for uses such as dishwasher, microwave, freezer etc.

PHOTO WALL STANDARD SIZE GUIDE
HOW MANY PHOTOS WILL I NEED?
Login and Registration Form